F750GS / F850GS/ F850 GSA- (2018 - 2023)

Product Compatibility
- vSystem
- xSystem
- eSystem
- REP Connect + Hex ezCAN K1600/Denali CANsmart/ Lonerider MotoCAN
- Traveller Expansion Bag
- Scorpion Dual Injector
- Magnum HCR
vSystem Installation
Step 1 - Find a vacuum source
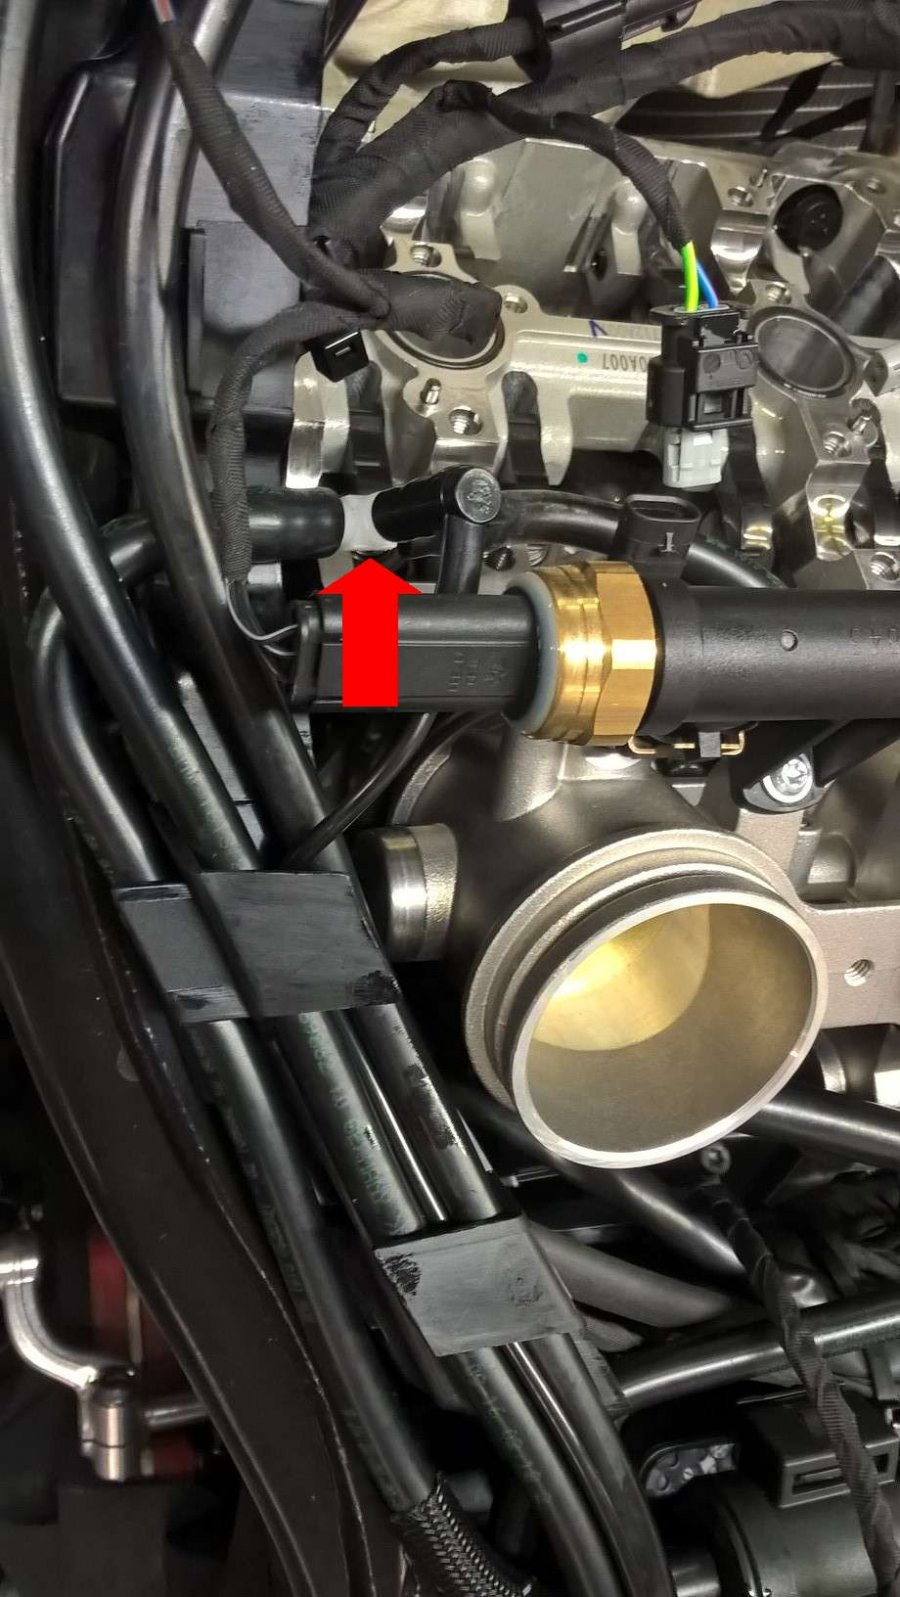
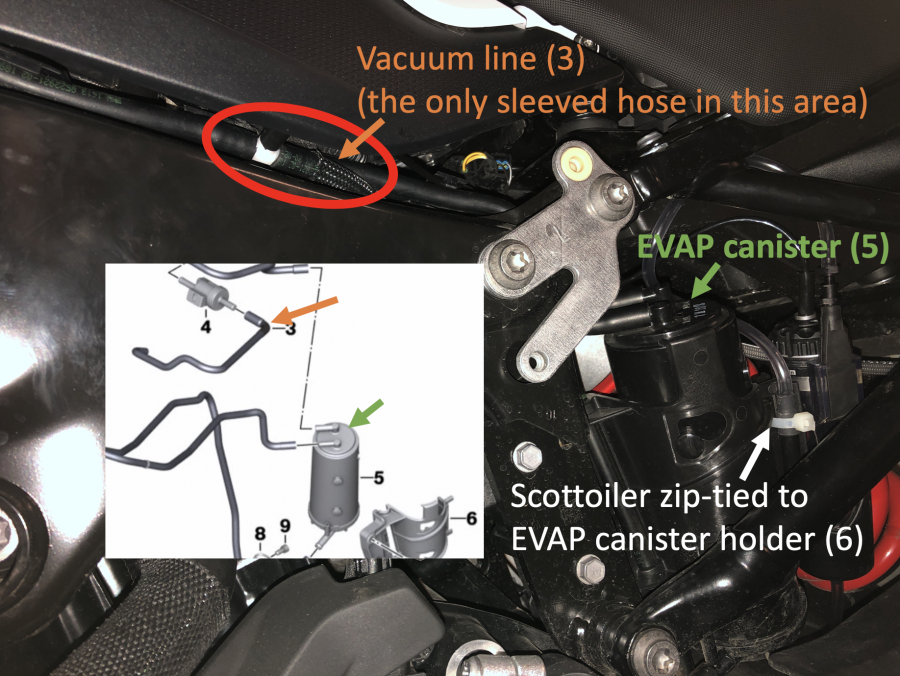
There is a vacuum pipe from the inlet tract to the EVAP system. You can read more about the EVAP System and identifying the correct vacuum pipe here. Cut this pipe and insert the 6mm Tee connector. Push the vacuum damper onto the third leg of the Tee connector.
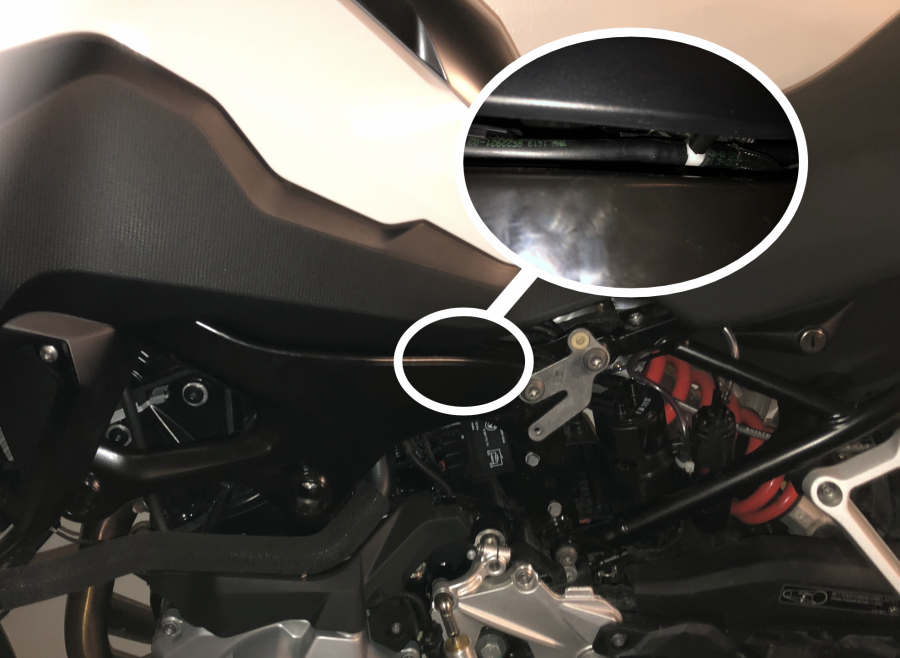
Remove the center cover of the gas tank and three bolts on the left of the left side cover--two on the tank and one connecting the side cover to the dash up by the left fork. Then you can pry the cover away from the side of the bike and you will see the correct pipe to take the feed from.
Step 2 - Find a place for the reservoir
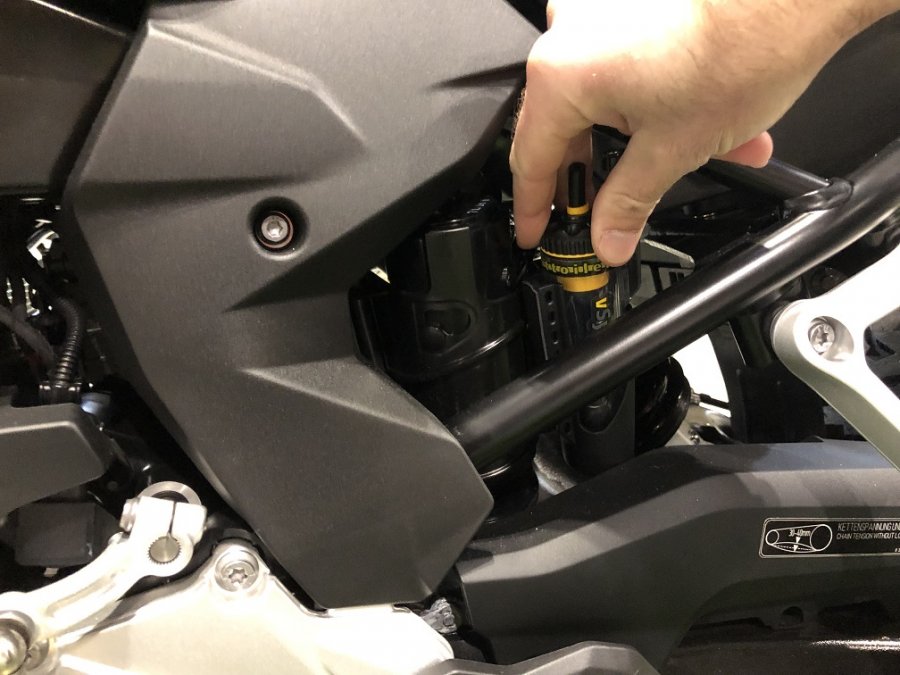
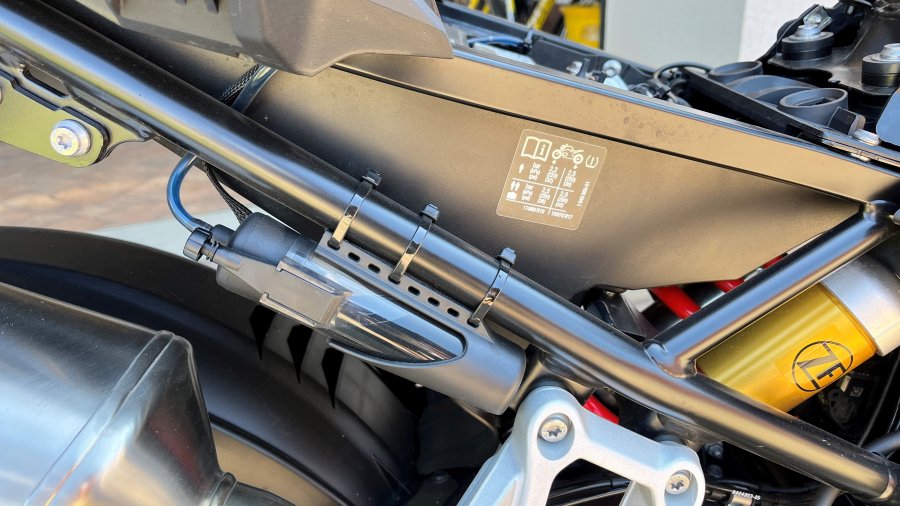
The reservoir can be mounted under the seat or on a frame spar. Ensure that the top of the reservoir is at least slightly raised (ideally above 15° from horizontal) to maximise the available range.
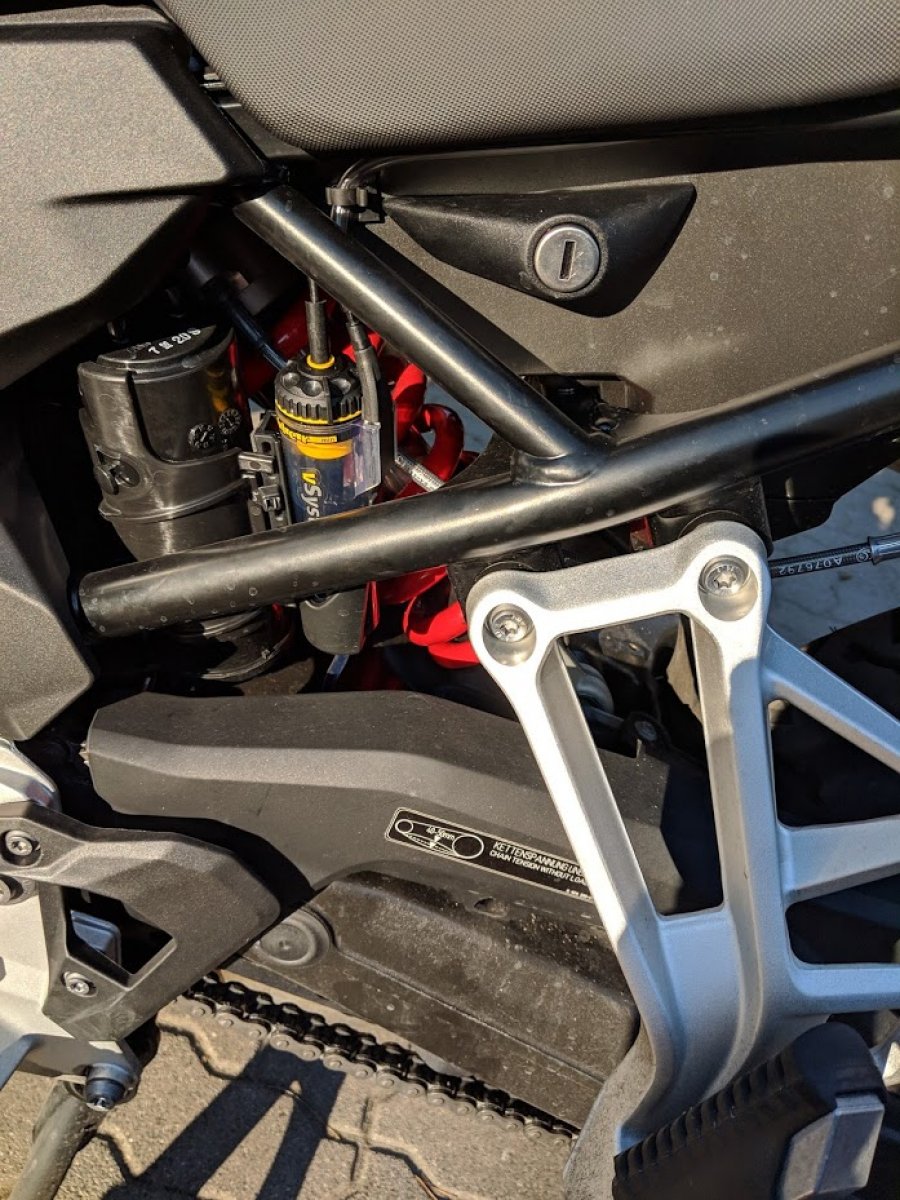
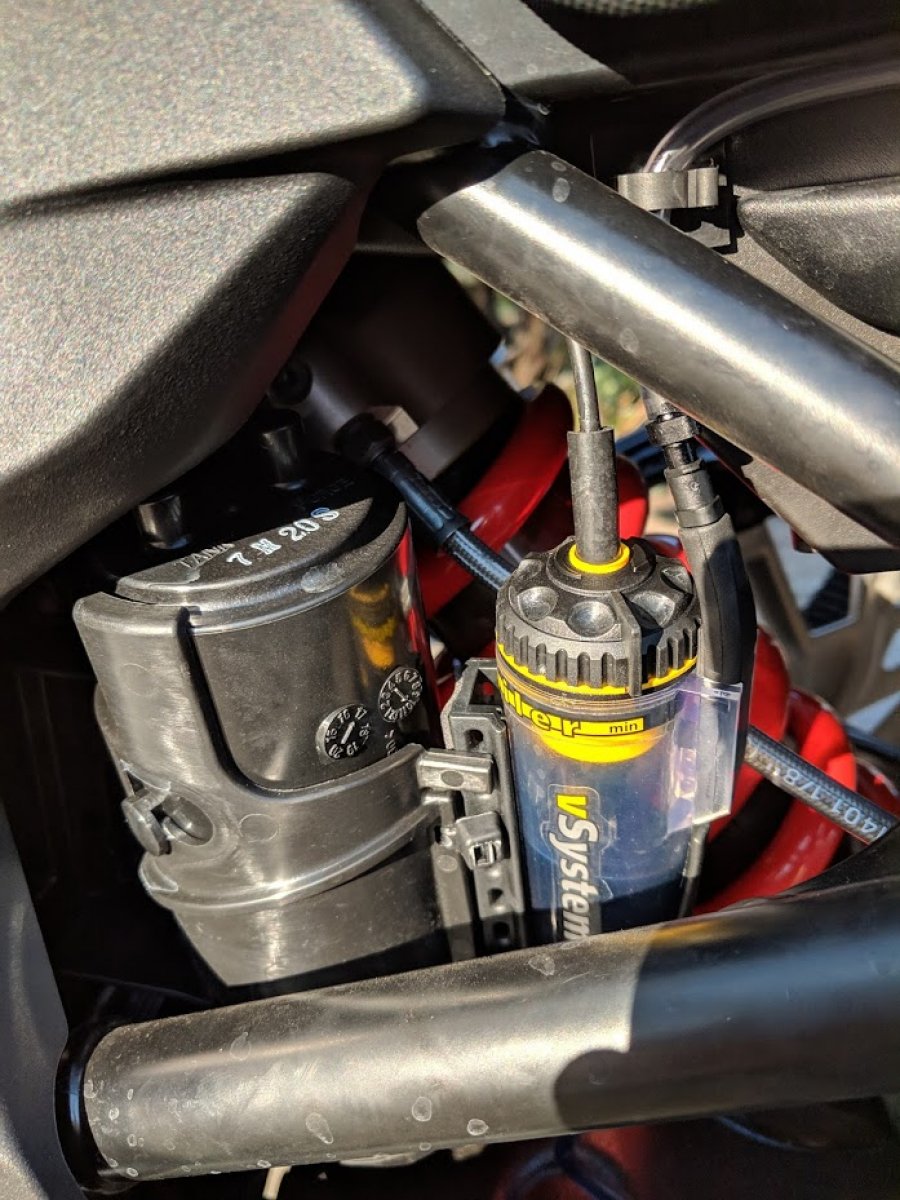
Step 3 - Mount the dispenser and connect the system
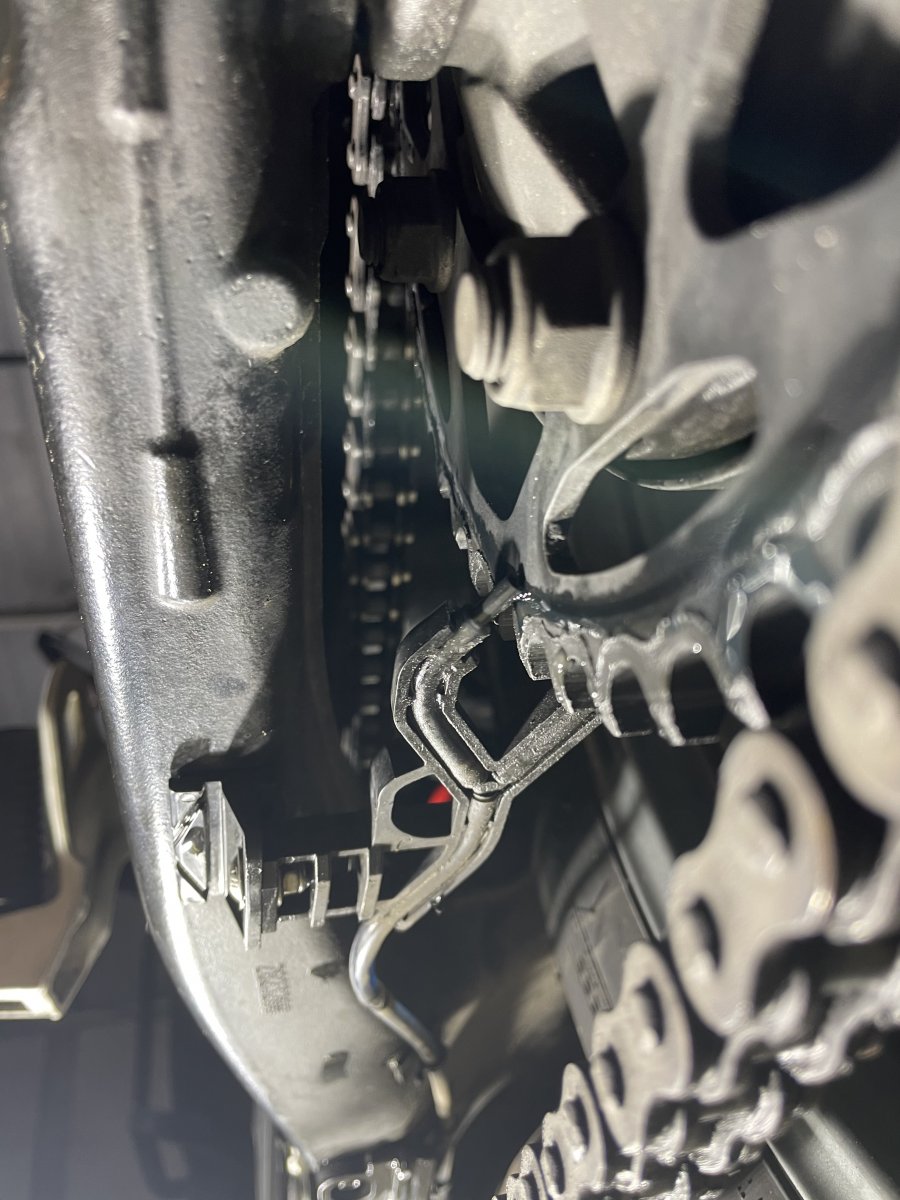
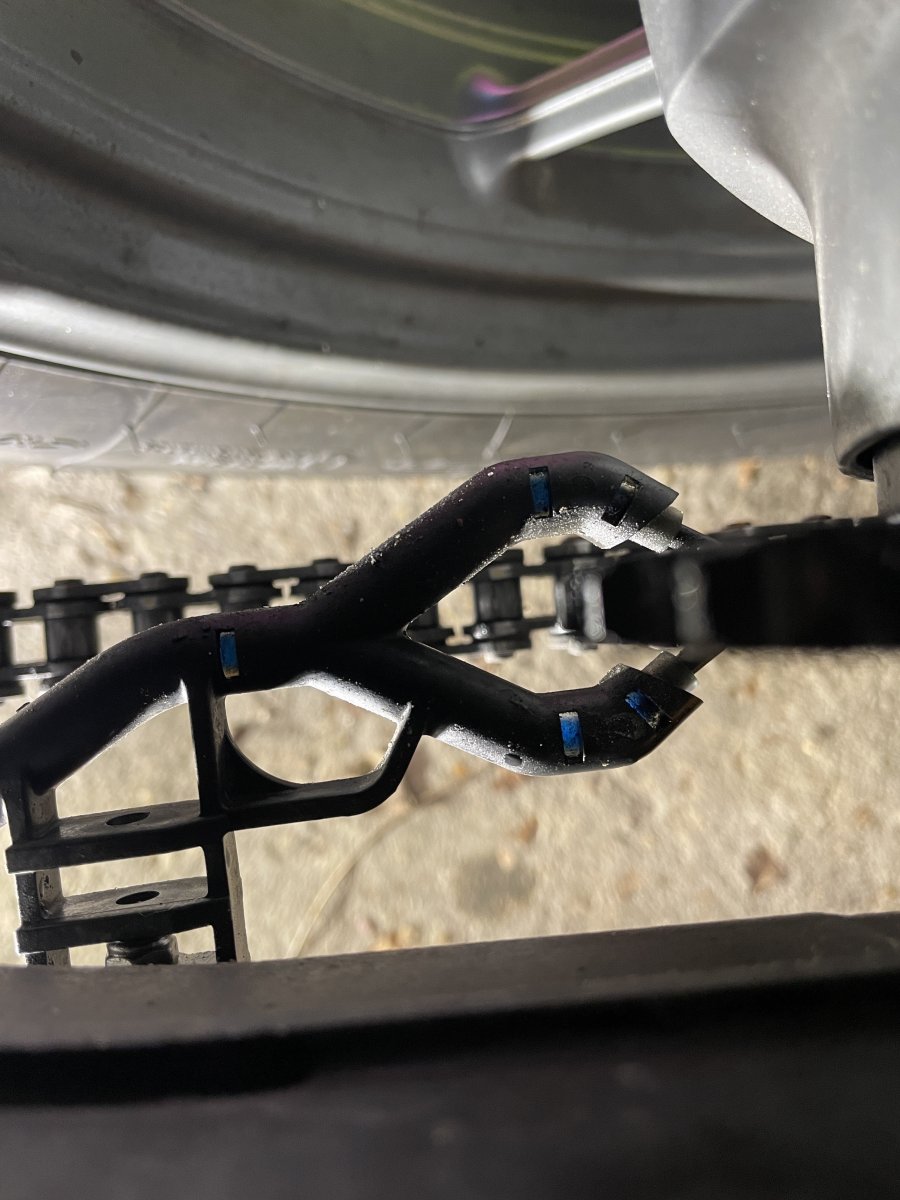
Make sure that the Injector lightly touches the face of the sprocket. Use spindle mounts, bobbin mounts or chain guards to install the dispenser assembly.


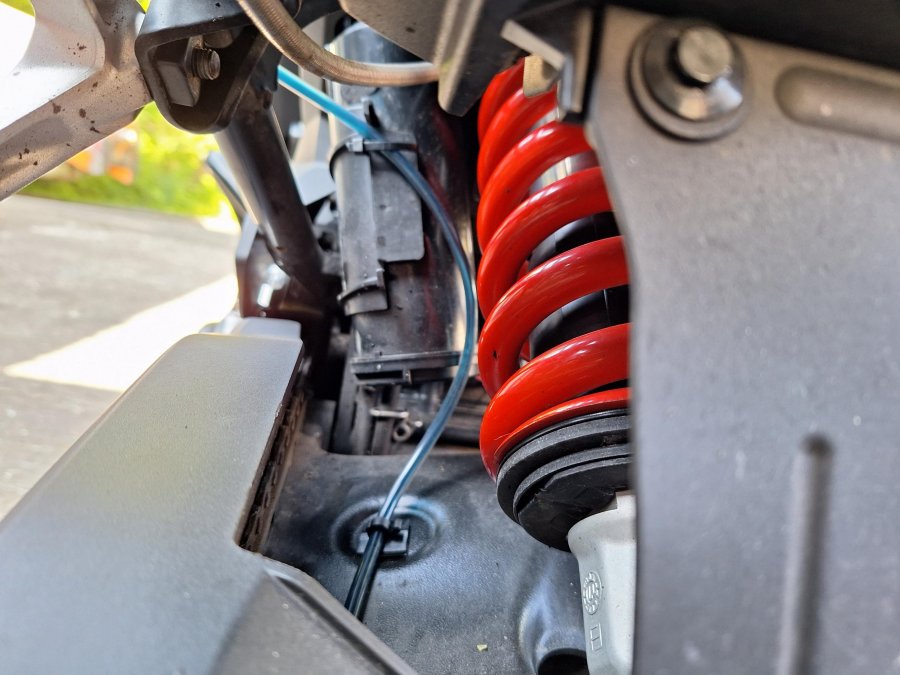
After you are happy with the placement of both the reservoir and the dispenser secure all parts before starting with the routing of the oil delivery tube. Take your time to find the best and most secure routing, avoiding hot engine and exhaust parts and taking suspension movement into account.

Step 4 - Fill, prime and set up your vSystem
Once fitted, fill and prime the system and set the adjuster knob to ’prime’. Start the engine and turn the adjuster knob until a flow of between 1 and 2 drops per minute is achieved. Check the condition of your chain after a ride, and then adjust as required.
For best results clean your chain before fitting the Scottoiler using paraffin or similar. Then lightly oil the chain from the bottle using a rag or a brush, this allows the oil from the Scottoiler to reach both sides of the chain. 1 to 2 drops per minute will maintain this film of oil on the chain.
xSystem Installation
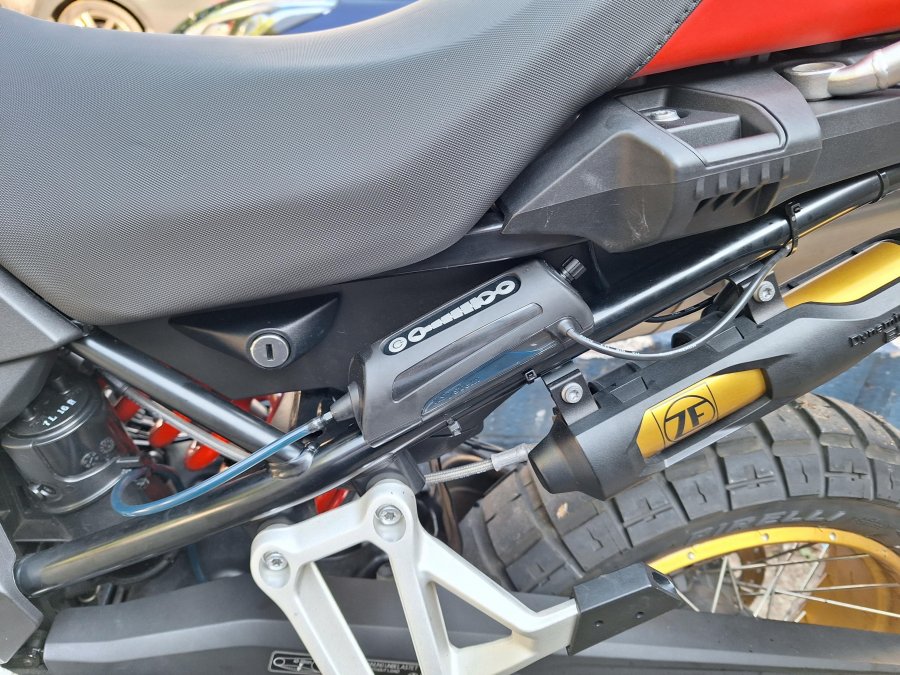
Step 1 - Find a place for the xSystem unit
The xSystem reservoir unit can be mounted in various locations on your motorcycle such as frame tubes or under the seat. The reservoir must be at least at a a slight angle with the outlet facing downwards.
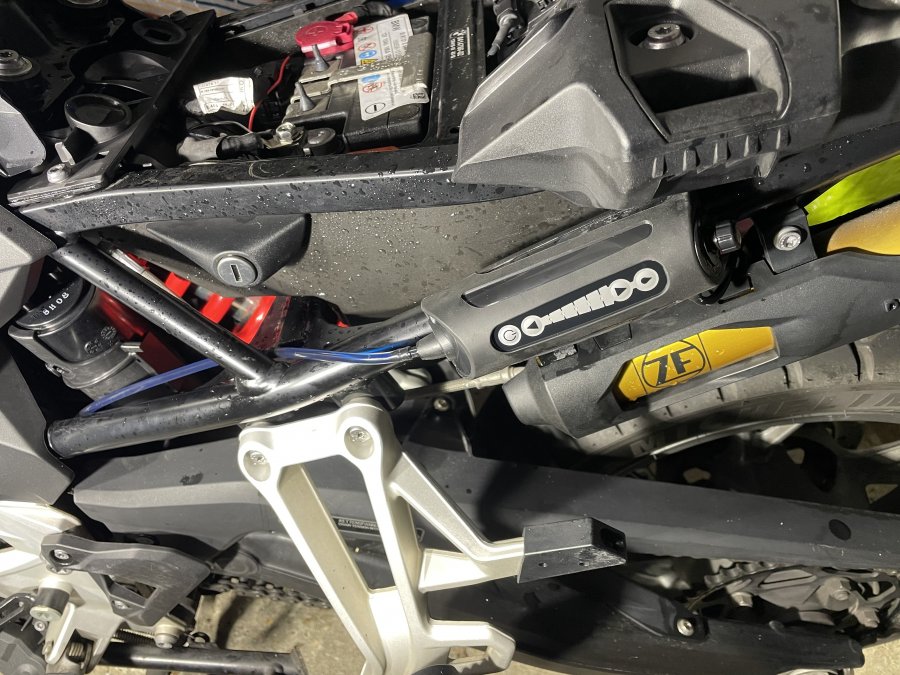
Step 2 - Connect the xSystem to the battery
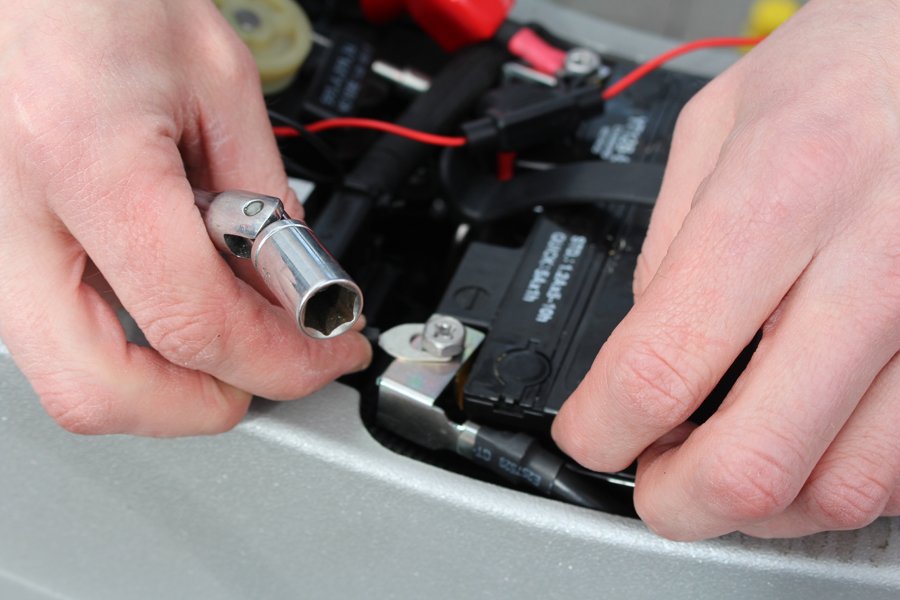
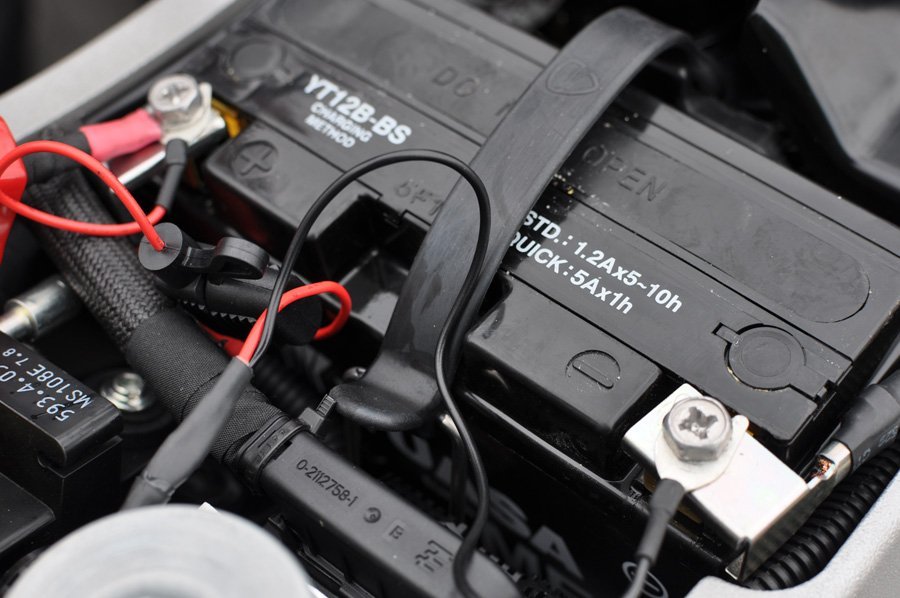
The xSystem must be wired directly to the battery. Attach the red wire to the +ve terminal and attach the black wire to the -ve terminal.
Slightly loosen the battery terminal screws to slip in the spade connectors.
Step 3 - Mount the multiform dispenser on the rear sprocket
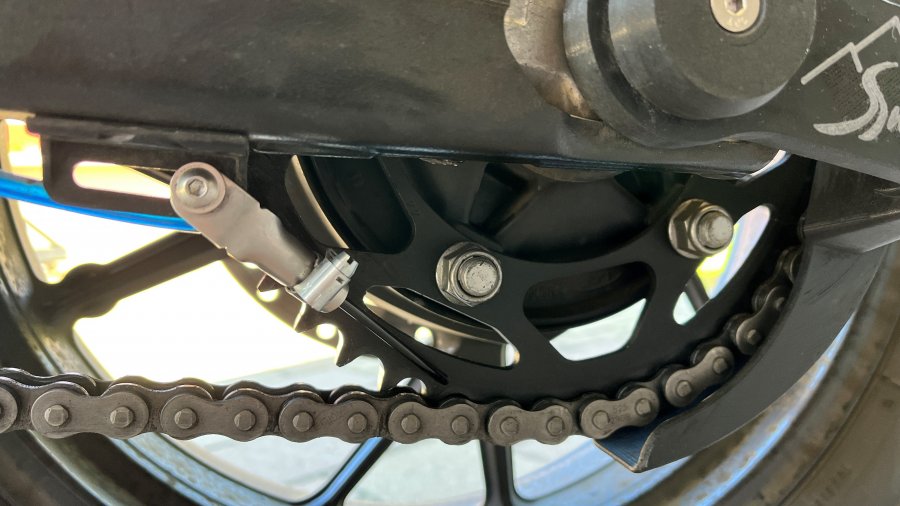
The multiform dispenser block can be manipulated and cut to fit most swing arms. Assemble the dispenser unit as per instructions. Identify the exact location before taking of the adhesive. Match up the adjustment of your chain with the adjustment of the multiform block to allow for forward/backward adjustment in line with your chain variance.
Before taking off the adhesive thoroughly clean the area and then wipe it down with the included IPA Alcohol Wipes to remove any residue.
Alternatively you can use the micro dispenser plate by itself on any other mounting point on your rear swing arm / sprocket location such as bobbin mounts or toe guards.

Scorpion Dual Injector


Step 4 - Fill, prime and install the check valve
Identify a desired location for the check valve in the delivery line. The location of the check valve can be anywhere along the delivery line and should be protected from outside elements. Fill the reservoir and prime the pump until oil reaches your desired check valve location. Cut and insert the check valve with the arrow facing in the direction of the oil flow. Repeat priming the pump until oil reaches the sprocket.
Step 5 - Set the flow rate
To turn the system on, press and hold the on/off button (at the bottom) until the LEDs light from the bottom , upwards. It will settle on the chosen flow rate.
To turn off, again, hold the on/off button and the LEDs will light up and turn off, one by one, downwards.
To increase the flow rate, make sure it’s switched on and press the upwards pointing arrow and the LED will move one position higher.
To reduce the flow rate, press the downward pointing arrow.
Set the flow rate on the middle section and adjust if required up/down depending on your riding conditions.
The xSystem will automatically switch on/off and no manual activation is necessary. You can manually turn the system on/off if you transport the motorcycle on a ferry or trailer.
eSystem Installation
The eSystem chain oiler is really easy to install and can be mounted on your bike in less than 1 hour. The installation consists of the three simple steps:
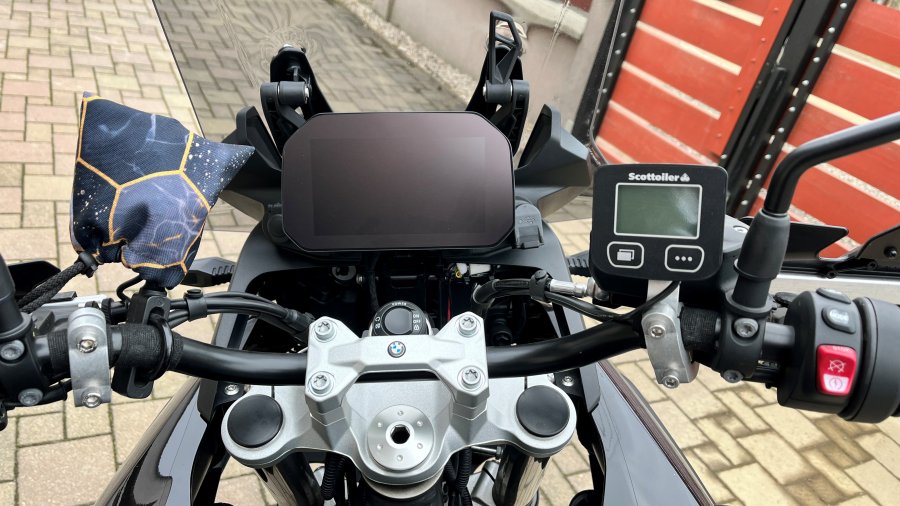
- Mount the display on your handlebars
- Connect the display and reservoir to your battery
- Attach the dispenser and route the delivery tubing to the reservoir
For an example of the installation see our eSystem v3.1 Fitting Instructions.
If you have our system installed on this specific motorcycle model, we would appreciate if you could send us pictures. With more pictures we can make the Installation even easier for all motorcyclists. Please send us your feedback and photos to technical@scottoiler.com.
Article Number: 499
Author: Oct 11, 2018
Last Updated: Oct 31, 2025
Online URL: https://marketingengineer.de/article/f750gs-f850gs-f850-gsa-2018-2023-499.html