


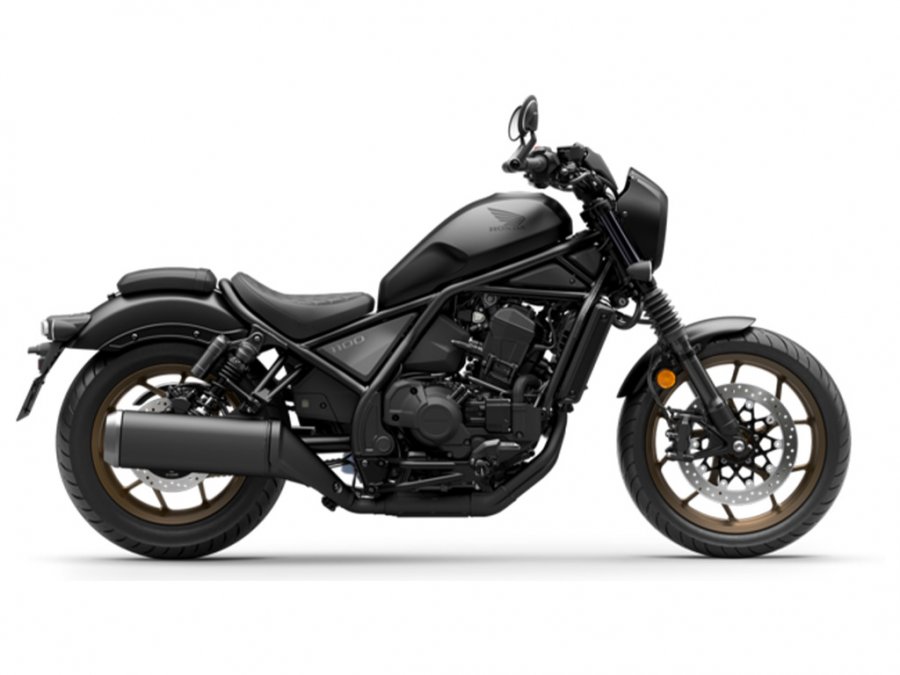
CMX 1100 Rebel ( 2021-)
Product Compatibility
- vSystem
- xSystem
- eSystem
- Traveller Expansion Bag
- Scorpion Dual Injector
- Magnum HCR
vSystem Installation
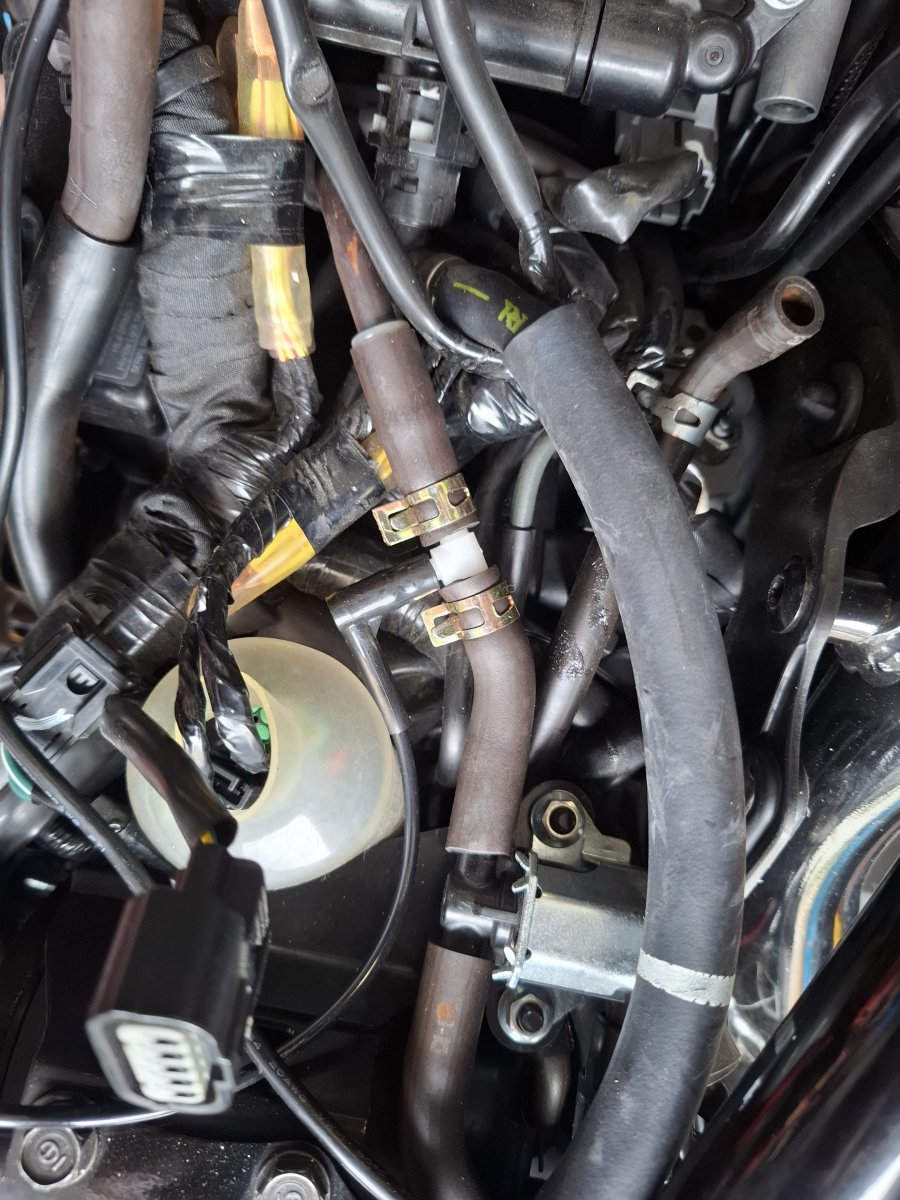
Step 1 - Find a vacuum source
The first step is to find the vacuum connection on your bike. This could be an already existing and blanked off vacuum spigot, a vacuum blanking screw, a vacuum operated fuel tap or a balancing pipe between your cylinders. Motorbikes after 2016 also have an EVAP System to control the emissions. This is operated by the engine vacuum and you can connect into the vacuum line between the throttle bodies and purge valve. Once you have identified your vacuum source connect it with the vacuum damper elbow and black vacuum line to your Scottoiler.
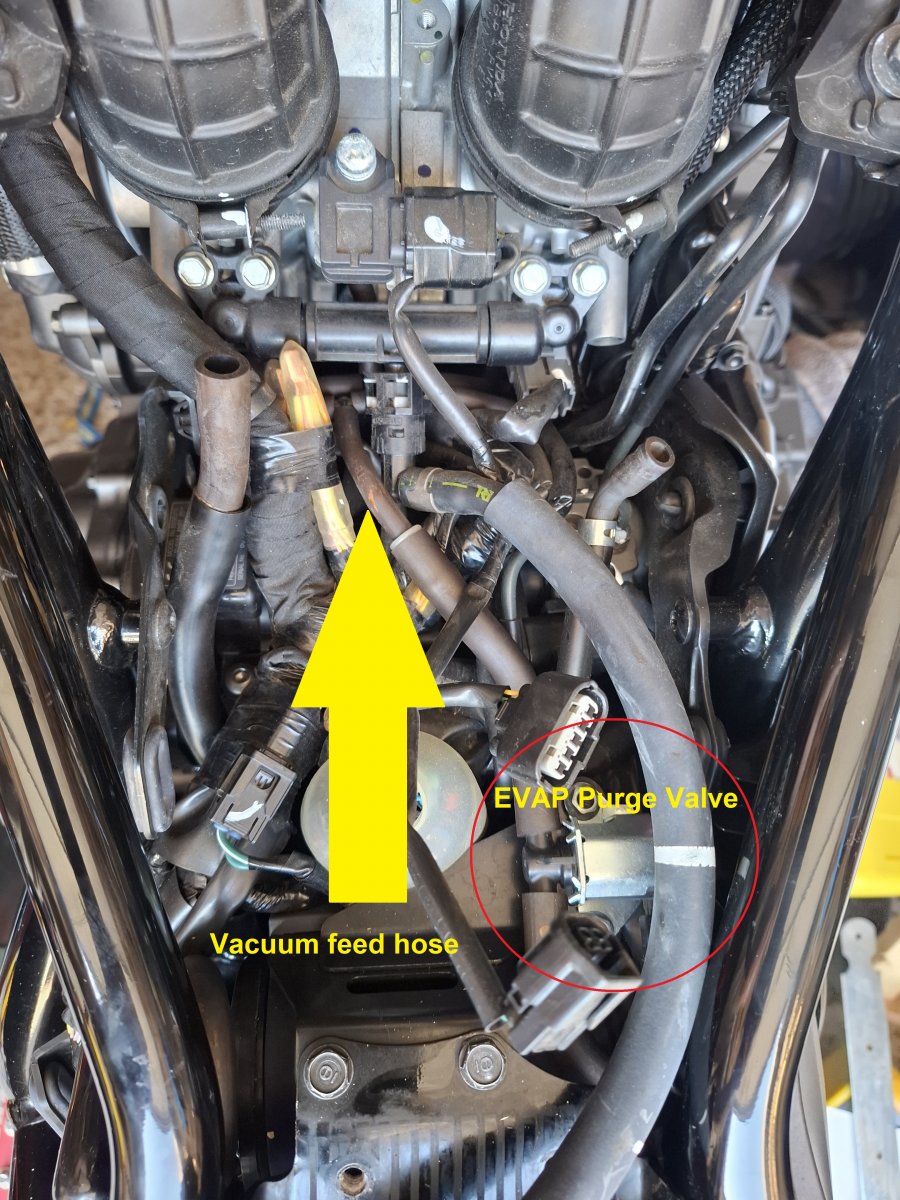
 NOTE: Fuel Tank must be removed for access.
Step 2 - Find a place for the reservoir
The reservoir can be mounted under the seat or on a frame spar. Ensure that the top of the reservoir is at least slightly raised (ideally above 15° from horizontal) to maximise the available range.
 RMV location suggestion.
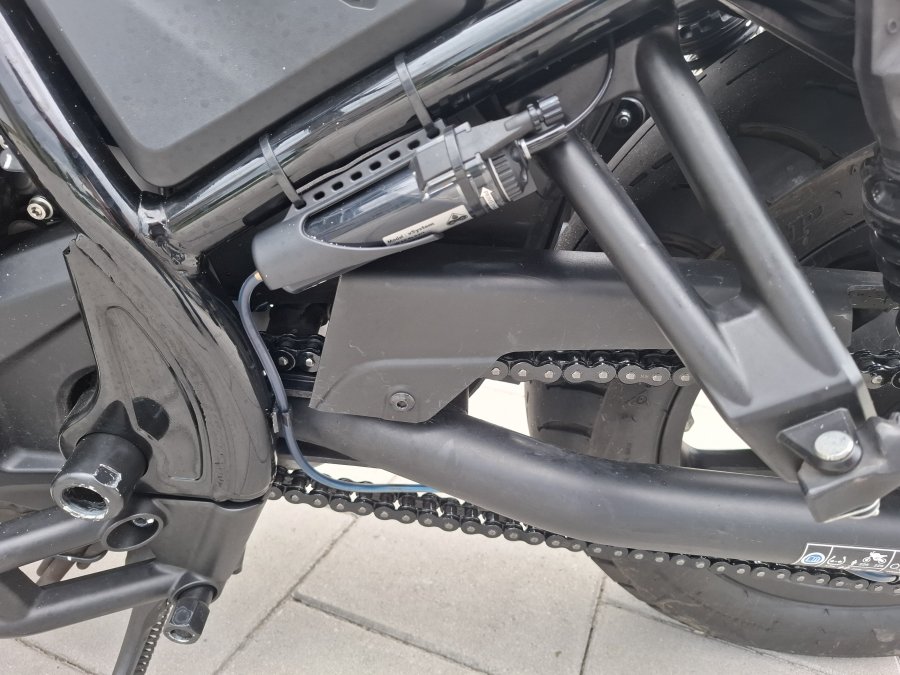
Step 3 - Mount the dispenser and connect the system
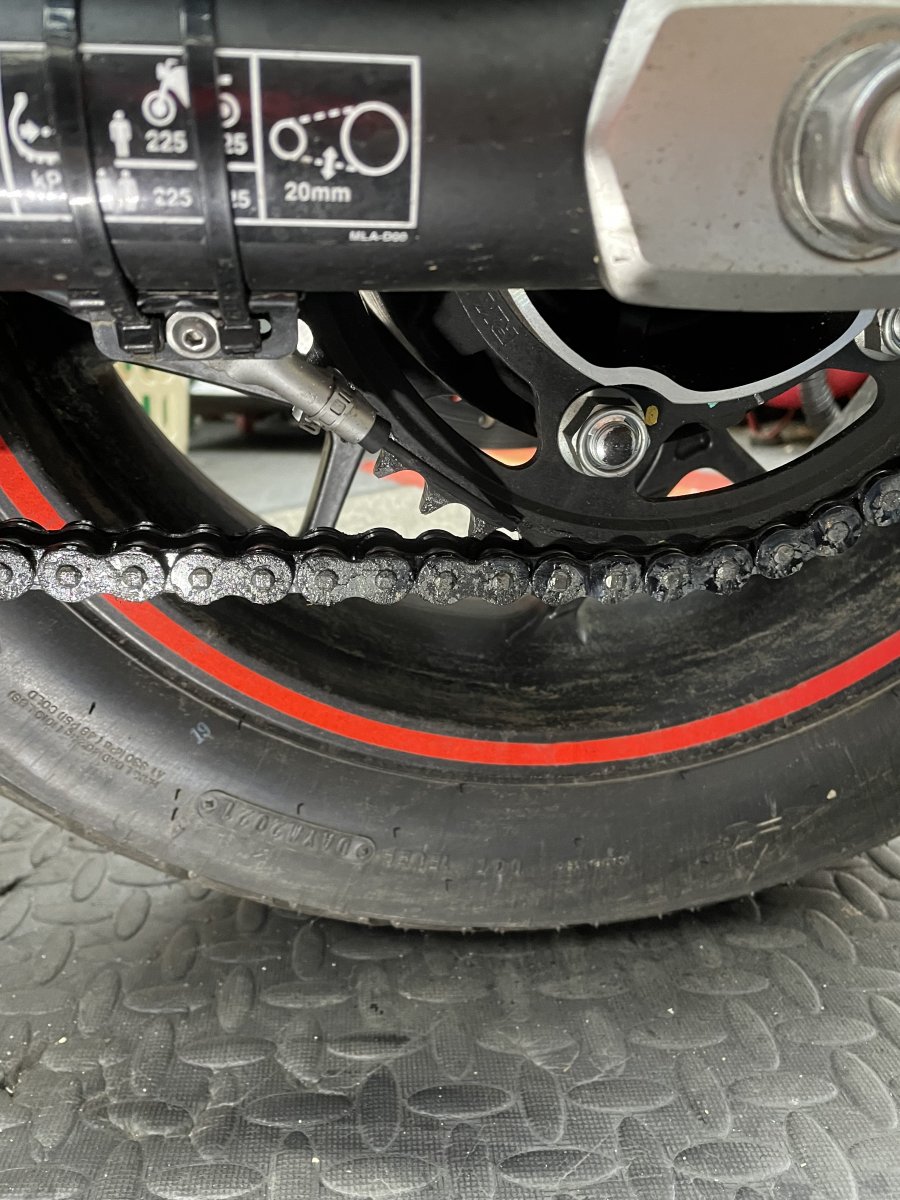
The multiform dispenser block can be manipulated and cut to fit most swing arms. Assemble the dispenser unit as per instructions. Identify the exact location before taking of the adhesive. Match up the adjustment of your chain with the adjustment of the multiform block to allow for forward/backward adjustment in line with your chain variance.
Before taking off the adhesive thoroughly clean the area and then wipe it down with the included IPA Alcohol Wipes to remove any residue.
Alternatively you can use the micro dispenser plate by itself on any other mounting point on your rear swing arm / sprocket location such as bobbin mounts or toe guards.
Single feed fitted using Multiform dispenser mount.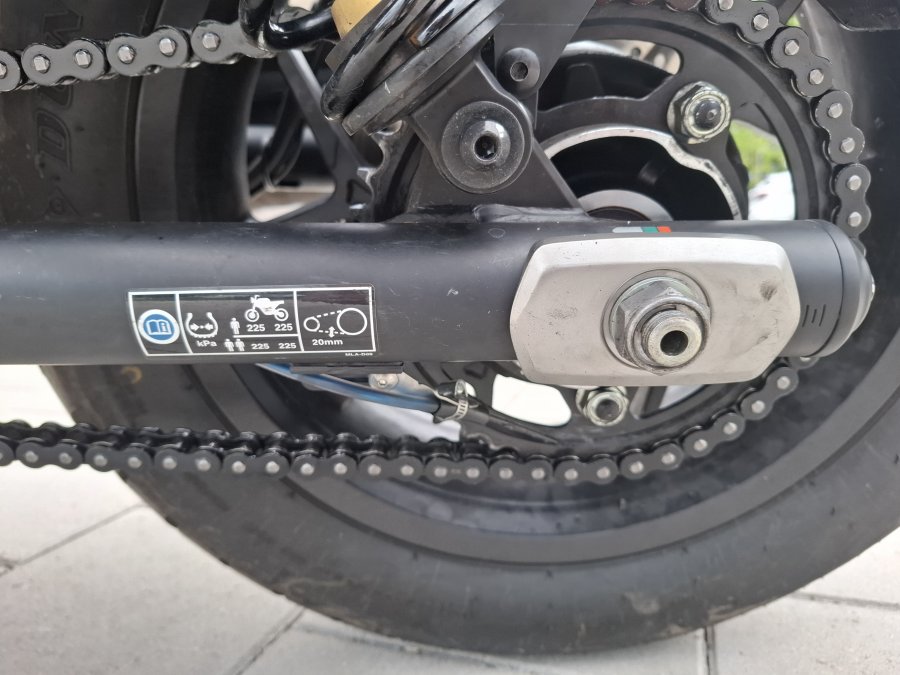
Step 4 - Fill, prime and set up your vSystem
Once fitted, fill and prime the system and set the adjuster knob to ’prime’. Start the engine and turn the adjuster knob until a flow of between 1 and 2 drops per minute is achieved. Check the condition of your chain after a ride, and then adjust as required.
For best results clean your chain before fitting the Scottoiler using paraffin or similar. Then lightly oil the chain from the bottle using a rag or a brush, this allows the oil from the Scottoiler to reach both sides of the chain. 1 to 2 drops per minute will maintain this film of oil on the chain.
xSystem Installation
The xSystem chain oiler is really easy to install and can be mounted on your bike is less than 1 hour. The installation consists of three simple steps:
- Find a place for the reservoir, either on the frame or under the seat
- Connect the reservoir to your battery
- Route the dispenser to your rear sprocket
For an example of the installation see our xSystem Installation Guide.
If you have our System installed on this specific motorcycle model, we would appreciate if you could send us pictures. With more pictures we can make the installation even easier for all motorcyclists. Please send us your feedback and photos to technical@scottoiler.com.

eSystem Installation
The Display Bracket (Part 5) can be rotated through 360° to give 4 mounting options and can also be flipped to provide 4 further options. The bracket can be secured to any M5/M6 bolt e.g. brake or clutch lever, brake cylinder or fairing mountings, in some cases you might need to trim the supplied bolt. It is possible to bend the bracket to shape, do so before fitting the Display Unit, part 1, to prevent damage to the unit. Alternatively, the sticky fasteners (Part 4) can be used to securely fasten the Display Unit to any flat surface e.g. the fork yokes.


Find a space for the reservoir
The reservoir can be mounted under the seat. The more vertical the reservoir is mounted the better. Avoid positioning the reservoir completely horizontally, as this will limit the available range. Remember to avoid exhaust and engine components. For further information, see our easy step installation guide – Reservoir Positions.

Mount dispenser on your rear sprocket and route delivery tubing
The tip of the Injector should lightly touch the sprocket face with the slash cut facing outwards.

Once fitted, fill the REP and prime the pump. Attach the delivery tubing and prime until the oil reaches the point where you want to install the check valve. Stop the priming process and cut and insert the check valve at the chosen position. Continue priming the system until oil reaches the sprocket.
For further information you can also watch our installation video that shows the setup steps. How to fill and prime my eSystem?
Set the flow rate, using the ’Driving Screen’ on the Display Unit, to 60-70 seconds per drop (s/dp), check the condition of your chain after a ride, and adjust as required.
